How To Make Your Own TV Box With Raspberry Pi, Kodi, And OpenVPN

In this tutorial, we are going to look at how you can install LibreELEC on a Raspberry Pi 2 with a working OpenVPN. But why get LibreELEC? Well, LibreELEC is a stripped back operating system designed purely for use with KODI, which will allow increased performance, as opposed to another operating system like Windows 10 that is dealing with other things at the same time. For the best media streaming experience through Kodi, you want LibreELEC. However, before we can get started, you will need a few things.
The Hardware Requirments
-
A Raspberry Pi 2 Board
-
Suitable power supply for Raspberry Pi 2 Board. All models require a 5.1V power supply.
-
A PC or Laptop Running a Windows OS
-
A reliable MicroSD card. A solid option is the SanDisk Ultra Class 10 8GB MicroSD card.
-
A MicroSD adaptor. Your laptop or computer may already have an SD adaptor built-in, which will work. If not, you will require a MicroSD adaptor.
Let’s Get Started
Step 1 – Setting Up Your Raspberry Pi 2 Board
The first step in getting your new system running is to install LibreELEC on to your Raspberry Pi 2 board. Like a computer, your Raspberry Pi 2 is useless without an operating system.
You Will Need:
-
A Working PC Running a Windows OS.
-
The Win32Disk imager installed, which you can find here.
-
The latest version of LibreELEC. For this tutorial, we used the Raspberry Pi 2 board, so we downloaded the corresponding version. You should select the version for your device.
-
7Zip or a similar file compression software.
Let’s Get Started
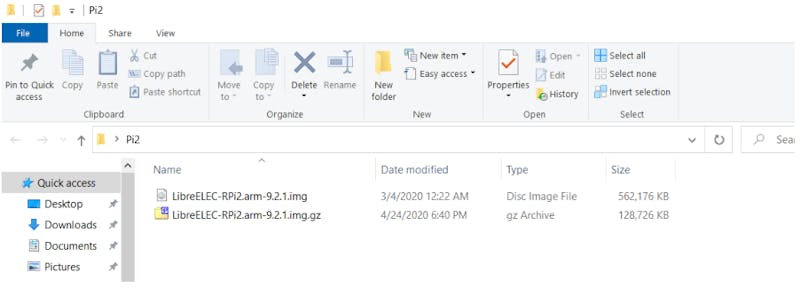
Perform the downloads of the three items above, the Win32Disk imager, The latest version of LibreELEC, and your chosen file compression software. Follow the installation options where necessary. Once downloaded, open up 7Zip and extract the compressed LibreELEC file. Once done you will have a libreELEC .img file, that looks something like this:
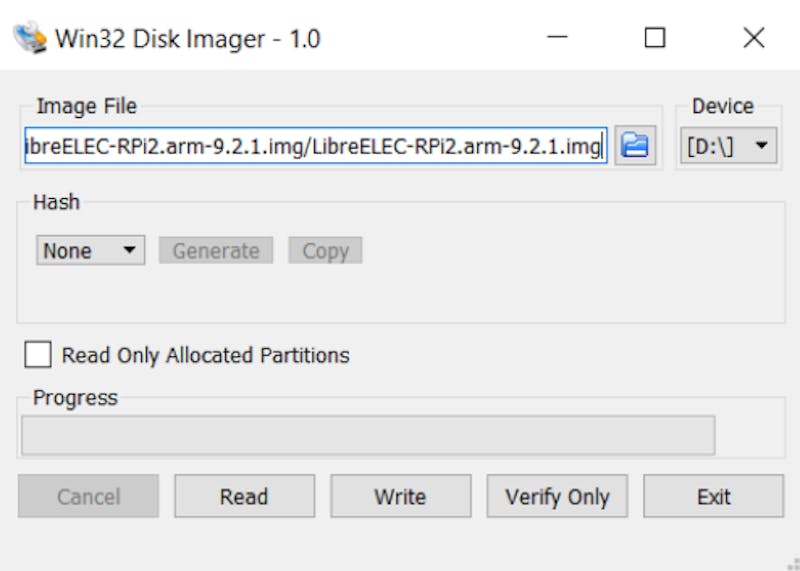
Now that you have the .img file extracted, it’s time to write it on to your MicroSD card. To do this, you need to open up the Win32Disk imager.
With the Win32Disk imager open, select your desired image file, which will be the LibreELEC file in this case. You will also need to choose the device that you wish to format with the .img file. Find out which device name your MicroSD card has, which you can do through the This PC menu on Windows 10. Then select the correct device. Do not select the wrong device as formatting willwipe any information and replace it with the LibreELEC file.
Once you have selected the image file and device, click on Write. The program will write the image onto the device. Once the operation has been performed, you can check to make sure it was successful by going to the computer management menu in Windows 10. The newly formatted device should look like this:

Congratulations, you have now formatted your MicroSD card ready for use with your Raspberry Pi 2 Board. On to the next step.
Step 2 – Configuring LibreELEC
At this point, you should have a MicroSD card loaded with LibreELEC. Insert your MicroSD card into your Raspberry Pi 2 board, connect the board to a monitor, and power it on. LibreELEC will automatically boot up, and for the first time, will then reboot to expand the filesystem across the unallocated space on the SD card.
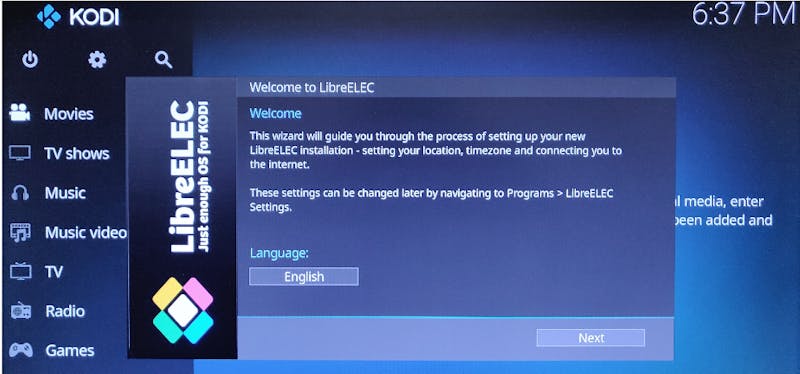
Once the device has finished rebooting you will be greeted with a simple set-up Wizard
Running Through The Wizard
The first preference you can set with the Wizard is your language. For this tutorial, we will go with English.
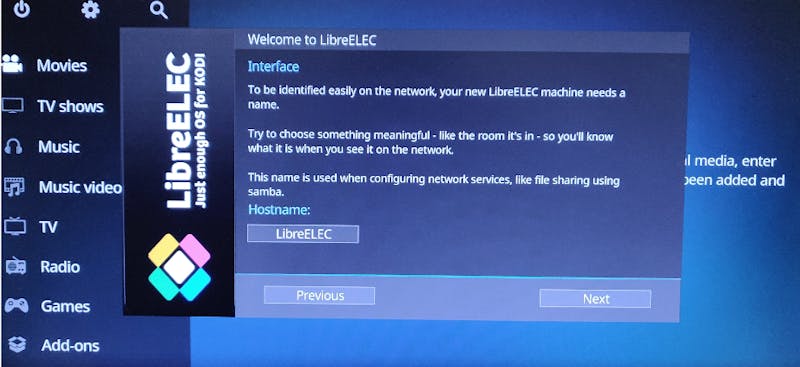
The next step is where you will pick a hostname. The hostname is what you will use to identify the device across your network, instead of having to remember the IP address. For this example, we have changed the name to LibreELEC
With the hostname set, it’s time to configure the local IP for your Raspberry Pi 2 board. For our example, we use a wired ethernet connection, which uses our DHCP configuration to automatically assign 192.168.1.33 as its IP address on the LAN network. Along with the hostname, this IP address is how you will connect to your Pi.

Pressing Next will allow you to enable some settings on the device with your choice, depending on your preference. We recommend that you enable SSH. Doing so means you will have to change the default password, but you will be able to then manage the device from any SSH client, such as PuTTY.
With that last step, you now have a Raspberry Pi 2 board with LibreELEC installed. You now need to configure your VPN.
Step 3 – Add A VPN Repository Client And Configure Your VPN
Your VPN is vital to ensure your network is secure from 3rd parties who might want to know what you are doing. So how do we go about setting up your VPN?
Adding The VPN Repository
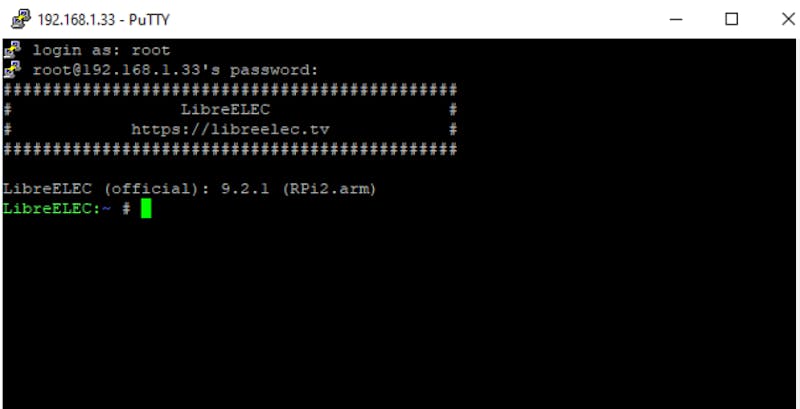
First, open your SSH client, such as the recommend PuTTY linked above. With your client open, enter the login details. Login as root and enter the password you set when you enabled the SSH setting in the LibreELEC wizard. Ensure the IP address shown is the same as the one you were shown previously. For this example, our IP address is shown as 192.168.1.33. After inputting the login details, your SSH client should look something like this.
Now that you have connected to your Pi device in PuTTY, you will need to download the zomboided repository from GitHub. To do this type the following:
$ wget https://github.com/Zomboided/repository.zomboided.plugins/releases/download/1.0.0/repository.zomboided.plugins-1.0.0.zip
Running the command will download the repository and save it in the home folder of ( /root/ )
Configure The Add-On From The Repository
With the repository downloaded and saved, open up LibreELEC and from the GUI, select the following:
Settings -> Add-ons -> Enable Unknown sources (Enabling unknown sources is necessary for installing .ZIP files)
With that enabled, head back to the home page of LibreELEC. Next, select the following:
Add-ons -> My Addons -> Install from ZIP file
Select the home folder we saved the repository to early, and select the .zip file. Doing this will install the Zomboided repository, which is needed to download the VPN Manager for OpenVPN.
With the repository installed, go to: Add-ons -> Install From Repository -> Select the Zomboided Add-on Repository -> Services -> VPN Manager for OpenVPN
With VPN Manager for OpenVPN selected, click install. After the installation is performed, you will find the new addon in the Add-ons menu.
Install The VPN
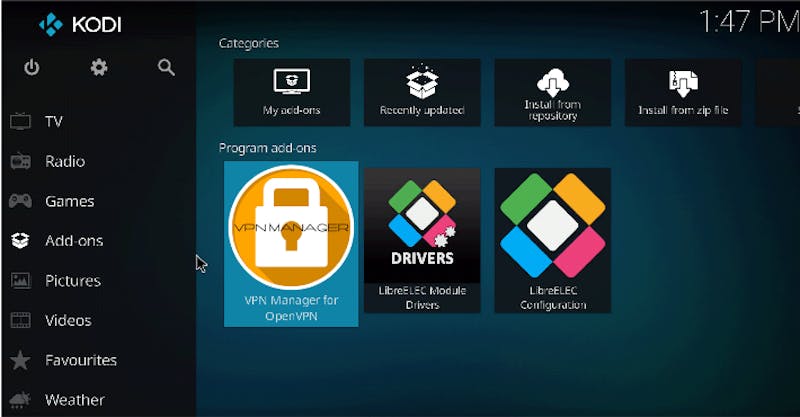
You have now downloaded and installed the VPN manager that will allow you to run a VPN on your Raspberry Pi 2 Board. The next step is to click on the VPN Manager addon, and you will be greeted with the configuration wizard.

You can go straight to settings, though we advise using the Wizard for the initial set-up. The Wizard will automatically download all the .crt and configuration files from the VPN provider’s site.
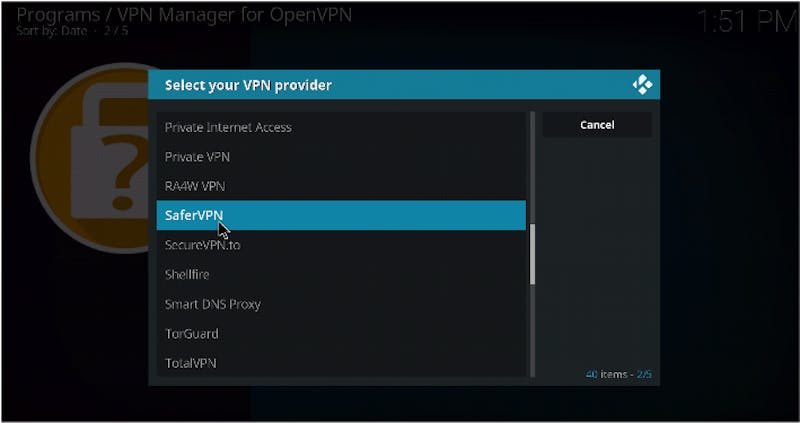
For this example, we used SaferVPN as they are one of the few VPN providers that offer a free trial. You should select the VPN provider that you use.
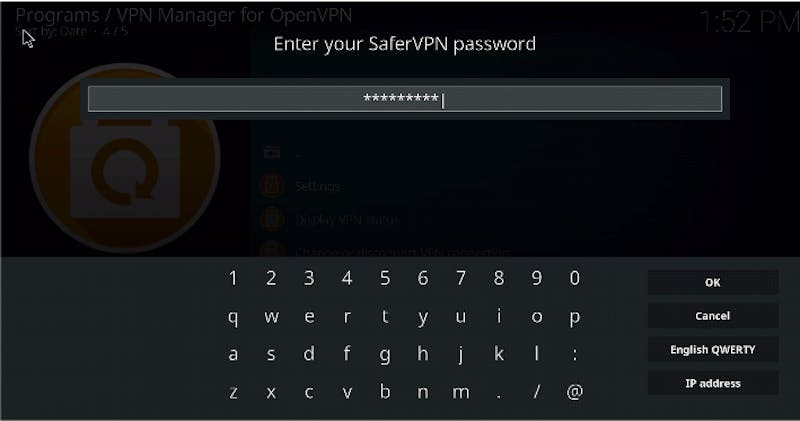
Once you have selected your VPN provider, you will need to connect your account to your LibreELEC program. For SaferVPN, the first step is to enter your user name, which is the email used when you initially registered for the VPN service.
After inputting your user name, you will need to type in the password of your VPN account.
With those details inputted, you will be able to set some preferences for your VPN. The first choice you are faced with will be the option to run the VPN automatically or not. It is recommended to have auto-connect turned on, as this saves you from having to turn on the VPN manually each time you start up the device.
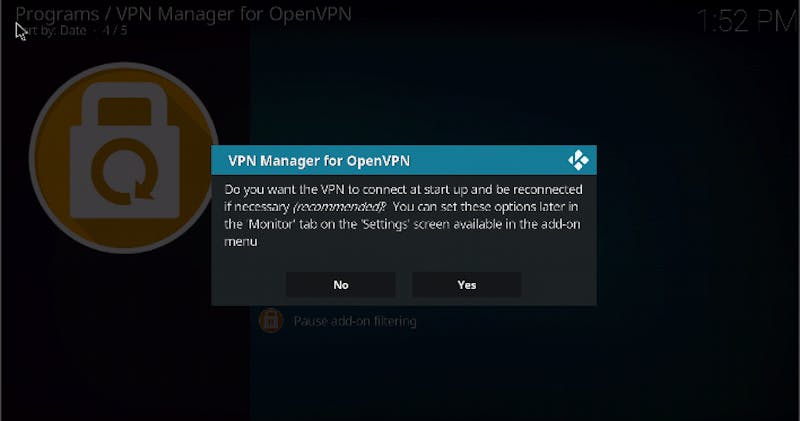
Next, you will be asked if you would like to start the VPN connection. As you do not want to cancel the work you have done up to this point with the VPN, you should select OK.

Now, LibreELEC will start downloading the .crt files and configuration preferences of your VPN service. Among these files will be a list of remote servers. This list will allow you to select where you would like your connection to appear to be coming from. For this example, we will choose Austria.
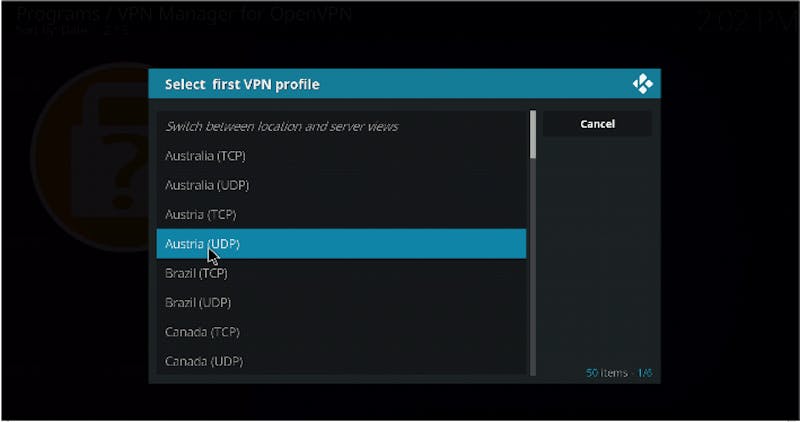
Your choice will be of personal preference, though you should keep in mind that, if for streaming, some regions are restricted from certain content. We also select UDP port though OpenVPN will also work with a TCP port if, for some reason, you can’t connect to the UDP port. One reason this might be is because of your firewall stopping the connection.
After you have selected your desired server, LibreELEC will attempt to connect to the VPN provider. Provided all goes well, you will receive a message giving the details of the VPN server.
Once you have your connected server details, hit OK, which will take you on to the final prompt of the set-up.

As per the prompt, you are all set up with your new VPN, which will connect each time Kodi is opened. Now that your VPN is in place, your internet service provider or anyone else with access to your network, won’t be able to understand the traffic that is coming to and going from your device, as data gets sent through the SSL socket.